With Halloween fast approaching we're starting to think about decorations, and if you're looking for some pumpkin-carving inspiration, we've put together four easy designs to try with step-by-step instructions.
First...You MUST Prepare Your Pumpkin
Whatever your chosen design, prepping your pumpkin is the first step. Once you've chosen your favorite at the local pumpkin patch or store, get it home and get started.
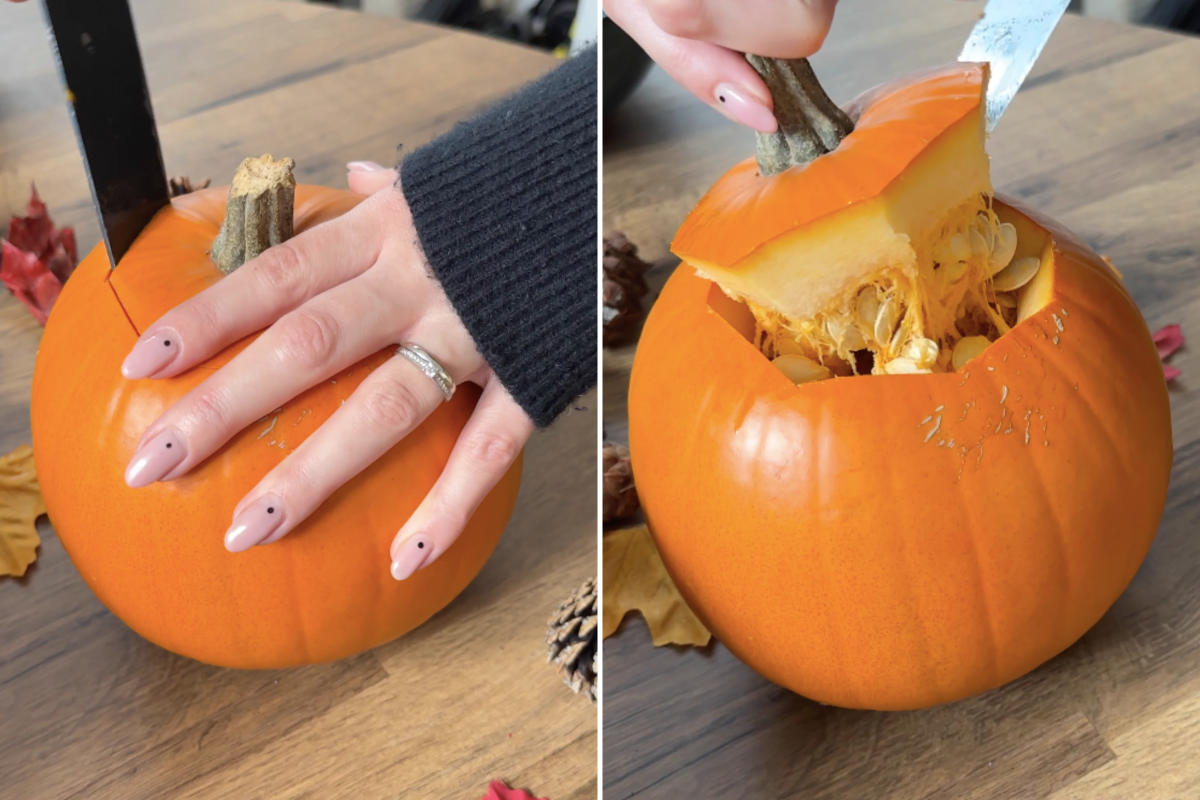
Using a sharp knife, carefully cut off the top of your pumpkin and remove the lid. Remember to cut your lid large enough to get inside and scoop out the insides, and keep it safe so you can replace it later.
Top tip: Try and find a pumpkin with a good stem, this will make placing and replacing your pumpkin lid easier.
Set the lid aside and scoop out the inside of your pumpkin. You can keep the seeds and flesh and use them to create some cozy fall recipes.
1. Happy Jack'O'Lantern


Our first design skips the spooky with a happy smiling face that will welcome your guests.
Step 1: Draw your design with a marker pen—for this one, make sure to draw a big smiling face, easy-to-cut triangle eyes, and an upside-down triangle for his nose.
Step 2: Cut it out—Cut out your features with a small knife or carving tool. Remember to cut just outside of your marker lines.
Step 3: Clean it up—Go back with your carving tool and neaten up the lines. It is also a good idea to wipe down your pumpkin with a wet cloth to get rid of any unwanted pumpkin flesh on the outside.
Step 4: Light and enjoy—Add a small candle to your pumpkin and replace the lid. Then pop Happy Jack in pride-of-place to delight through the spooky season.
2. Cat'O'Lantern


The puurfect design for pet lovers this Halloween, why not create a cat-themed pumpkin to add some fun to your decor?
Step 1: Draw your design with a marker pen — Start with triangular ears, circular eyes and a smaller triangle nose at the middle. At each side, add whiskers with a thick line.
Step 2: Cut it out — Cut out your features with a small knife or carving tool. For the circular eyes, consider using a vegetable peeler to create an easy uniform circle.
Top tip: Cut your whiskers with a single line, and then wiggle your carving tool to create a gap wide enough that light will shine through.
Step 3: Clean it up—Go back with your carving tool and neaten up the lines, paying particular attention to the whiskers. Wipe down with a cloth to clean up the outside, too.
Step 4: Light and enjoy—Add a small candle to your pumpkin and replace the lid. Then find the perfect spot for your Cat'O'Lantern.
3. Spooky Freestyle


Looking for something more classic? A go-to spooky face is always a winner at Halloween, plus, there are so many variations to play with.
Step 1: Draw your design with a marker pen—Your spooky freestyle pumpkin can be as crazy as you like. Play with sharp lines to create a menacing mouth and give him some ghoulish eyes to match.
Step 2: Cut it out—Cut out your features with a small knife or carving tool. Cut outside your marker lines and be extra careful when pushing the features out so you don't accidentally take an extra bit of pumpkin with you.
Step 3: Clean it up—Neaten up the lines with your carving tool, paying particular attention to the eyes and any corners. Wipe down the outside of your pumpkin with a damp cloth to keep everything tidy.
Step 4: Light and enjoy—Add a small candle to your pumpkin and replace the lid. Now you're ready to display your spooky pumpkin for all to see.
Top tip: For a safer and longer-lasting spooky effect, try a battery-powered LED tealight inside.
4. Fabulous Florals


If you're looking for something a little different this season, why not try creating a floral display with your pumpkin? With minimal carving and maximum impact, this one is sure to impress.
Step 1: Select your flowers—Pick some seasonal flowers, incorporating orange tones will really make your design pop. You can use real flowers, but fake ones are just as effective and will last longer.
Step 2: Arrange your design—Remove the lid of your pumpkin, you won't need it for this design. Then spend some time placing your floral display, adding and removing elements until it looks just right.
Step 3: Add light and enjoy—Once you're happy with the display, make sure it sits in pride of place—these make fantastic centerpieces for fall meals. If you're missing the comforting glow of the candle, add a small set of battery-powered lights.
Uncommon Knowledge
Newsweek is committed to challenging conventional wisdom and finding connections in the search for common ground.
Newsweek is committed to challenging conventional wisdom and finding connections in the search for common ground.
About the writer
Alice Gibbs is a Newsweek Senior Internet Trends & Culture Reporter based in the U.K. For the last two years ... Read more